What It Does
- Turns any form into a public-facing page that anyone can fill in
- Generates a QR code you can print and post at your workplace
- Creates a shareable URL you can copy and send
- Submissions are anonymous — no Timecloud login needed
- All submissions appear alongside your existing entries in the Submissions tab, clearly labelled as Public
Good to Know
- Public forms support Photo Upload fields — respondents can attach images and documents without logging in.
- Public forms support Signature fields — respondents can draw a hand-written signature directly on their device.
- Public forms cannot include single file upload fields. Remove these before enabling public access.
- When a form is made public, Triggers (clock in / clock out) and User Groups are automatically hidden — public forms are standalone.
- Each public form includes bot protection to prevent spam submissions.
Making a Form Public
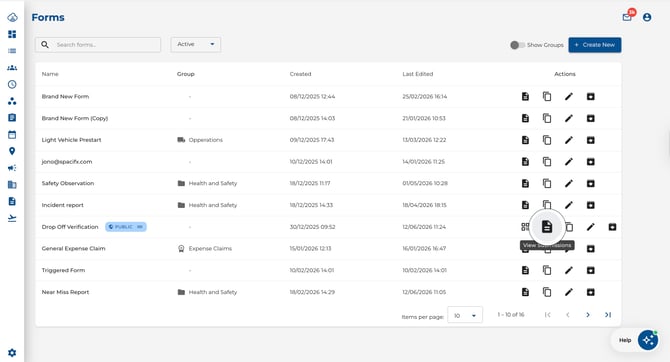
- Go to Forms in the main navigation.
- Click + New Form to create a form, or click the edit icon on an existing form.

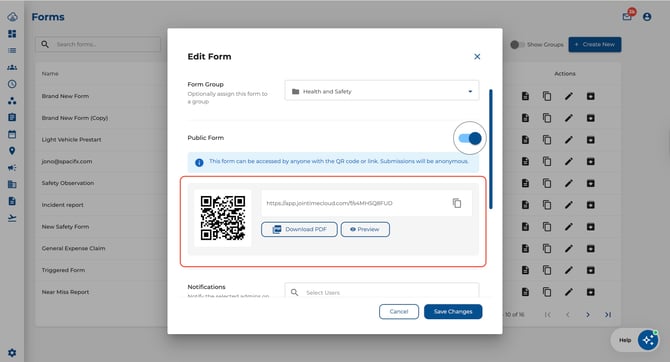
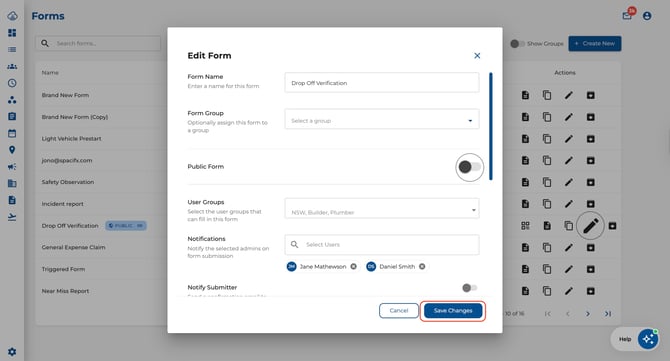
- In the form editor, scroll to the 'Public Form' tab.
- Toggle Public Form on.
- Click Save Changes.
- Once saved, a QR code preview and public URL appear in the settings panel.
Sharing the QR Code
- Download PDF — Click Download PDF in the form editor to get a print-ready QR code. Post it at reception desks, notice boards, or job sites.
- Copy URL — Click the copy icon next to the public URL. Paste it into emails, messages, or your website.
- Preview — Click Preview to see exactly what the person scanning the QR code will see.
You can also download the QR code directly from the Forms list by clicking the QR code icon in the Actions column, or copy the URL using the link icon next to the Public badge on the form name.
Signatures on Public Forms
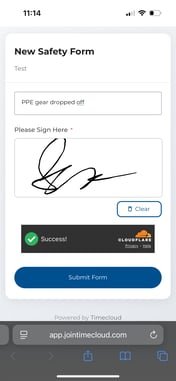
Public forms can include Signature fields, letting respondents draw their signature with a finger or stylus on any device.
How It Works for Respondents
- A signature pad appears inside the form with a crosshair cursor.
- Draw your signature using a finger (phone/tablet) or mouse (desktop).
- Tap Clear to erase and start over.
- The signature is captured automatically when you submit the form — no extra steps needed.
Tips
- The signature pad resizes to fit the screen, so it works on phones, tablets, and desktops.
- If the form marks the signature as required, you must draw something before you can submit.
- Keep signatures simple — overly complex drawings may trigger a size warning asking you to clear and try again.
File Uploads on Public Forms
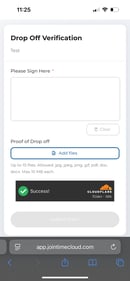
Public forms can include Photo Upload fields, letting respondents attach files without a Timecloud account.
What Respondents Can Upload
- Allowed file types — JPG, JPEG, PNG, GIF, PDF, DOC, DOCX
- Maximum size — 10 MB per file
- Maximum files — up to 10 per Photo Upload field
How It Works for Respondents
- Click Add files on the Photo Upload field.
- Select one or more files from their device.
- Each file shows a progress indicator and a green check once uploaded.
- Remove a file by clicking the X beside it.
- Tap Submit Form when ready — all uploaded files are included in the submission.
Reviewing Uploaded Files
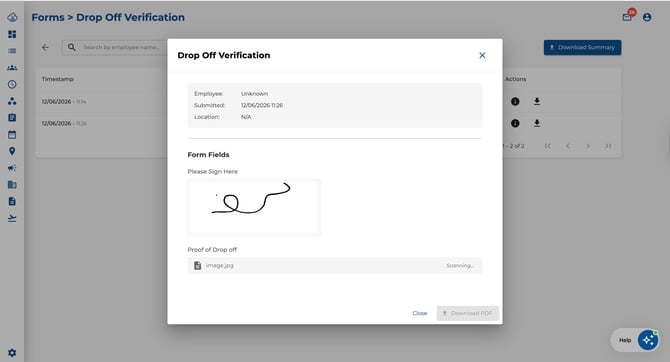
- Open a submission to see attached files listed under the Photo Upload field.
- Files from public forms go through a security scan before they can be downloaded.
- While scanning, the file shows "Scanning…" — once clear it becomes downloadable.
- If a file fails the scan, it shows "Unavailable" and cannot be downloaded.
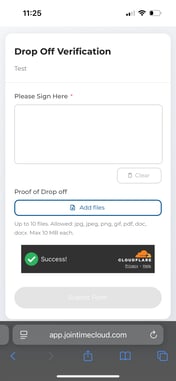
What the Person Filling In the Form Sees
- They scan the QR code or open the link on any device.
- A branded Timecloud form loads — no login screen.
- They fill in the fields, draw any required signatures, attach any required files, and tap Submit Form.
- A confirmation screen appears: "Thank you for your submission. Your response has been recorded."
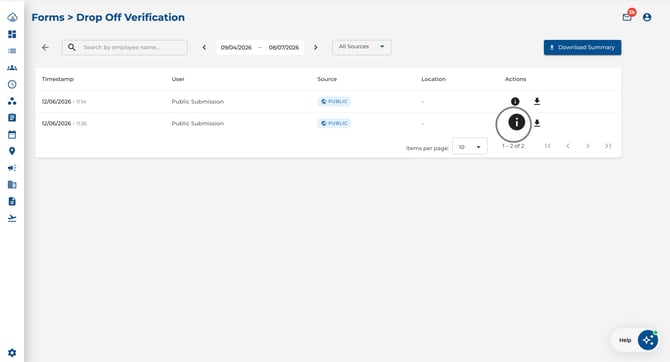
Reviewing Public Submissions
- Go to Forms and click the submissions icon on the form.
- Public submissions display a Public badge in the Source column.
- Use the Source filter dropdown to show All Sources, Standard only, or Public only.
- Open any submission to view the captured signature image alongside other field values.
Disabling Public Access
- Open the form in the editor.
- Toggle Public Form off.
- Click Save Changes.
The QR code and link will stop working immediately. You can re-enable it at any time — the same QR code and URL will work again.