What Is a Roster Pattern?
A roster pattern is a saved snapshot of a roster period — including shifts, employee assignments, roles, and job items. You define how many days the pattern covers (e.g. 7 for a weekly rotation, 14 for a fortnightly cycle) and Timecloud stores it as a reusable template.
Where to Find Roster Patterns
Roster patterns live on the Shifts page alongside your shift templates and shift patterns.
- Click Shifts in the left sidebar.
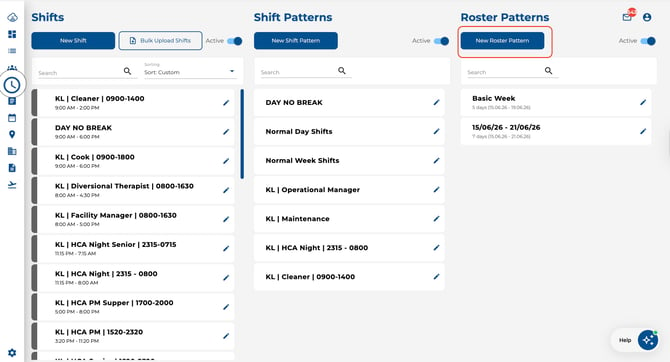
- Find the Roster Patterns section on the right-hand side.
- Here you can see all your saved patterns, create new ones, and toggle between Active and Archived patterns.

Creating a Roster Pattern
There are two ways to create a roster pattern:
Option A — Save from the Roster (Quick)
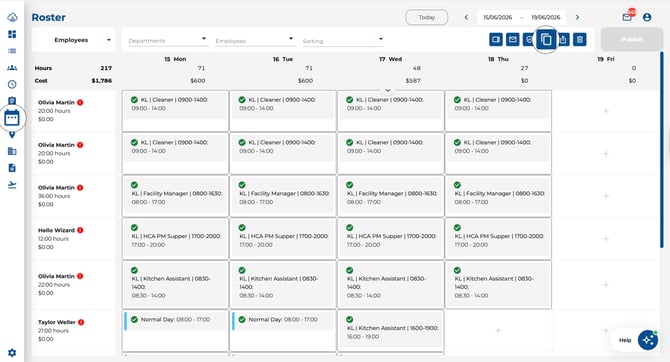
- Open the Roster page and build your schedule for the period you want to save.
- Click the Autofill button in the toolbar.
- Select the Save Template tab.
- Enter a Pattern Name.
- Click Save Pattern.
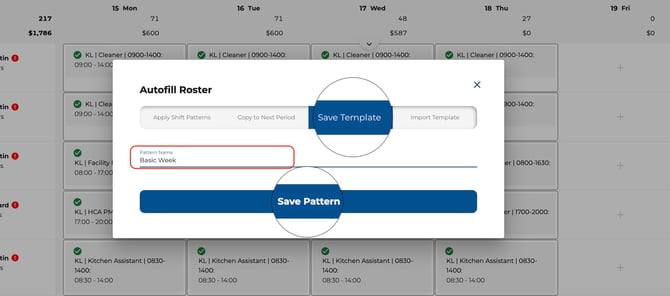
- Timecloud captures all shifts, assignments, and roles for the current period and saves them as a pattern.
Option B — Create from the Shifts Page (From Scratch)
- Go to Shifts in the left sidebar.
- In the Roster Patterns section, click New Roster Pattern.
- Enter the Number of Days this pattern covers (e.g. 7, 14, or up to 365).
.jpeg?width=670&height=361&name=Image%2011-06-2026%20at%2011.59%20AM%20(1).jpeg)
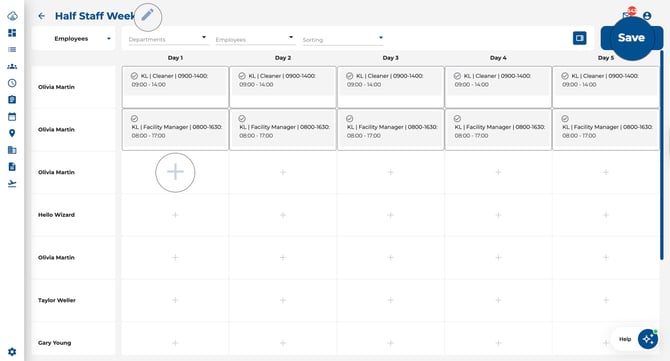
- Click Create — this opens the roster in Template Edit Mode.
- Build your pattern by adding shifts, assigning employees, and setting roles just like a normal roster.
- When finished, navigate back to the Shifts page.
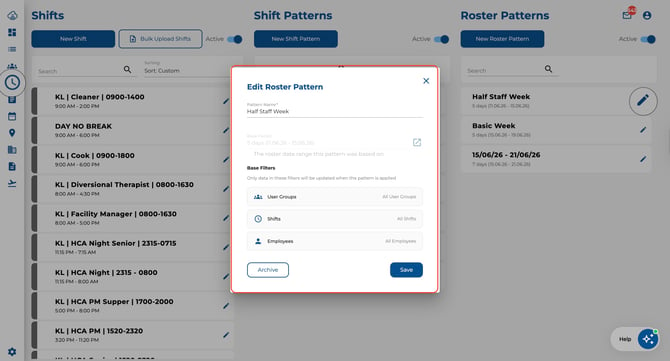
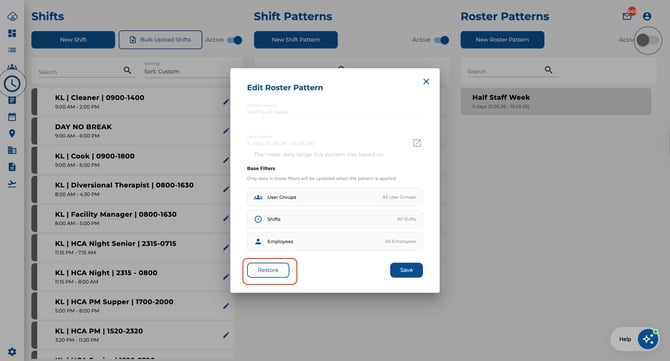
Editing a Roster Pattern
- On the Shifts page, find the pattern in the Roster Patterns section and click it.
- The Edit Roster Pattern dialogue opens, showing:
- Pattern Name — rename the pattern here.
- Base Period — the date range this pattern was originally based on.
- Base Filters — which departments, shifts, and employees are included.
- Click the open icon next to the base period to enter Template Edit Mode and adjust shifts and assignments.
- Click Save to apply your changes.
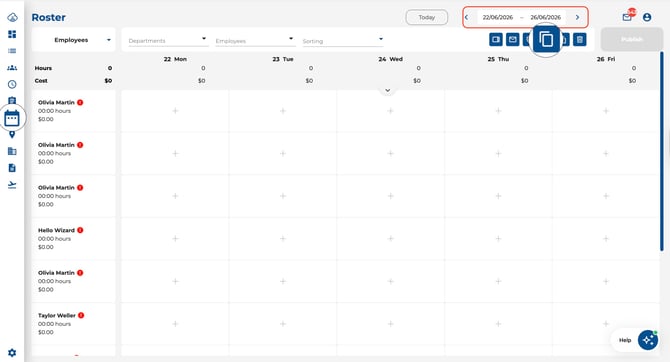
Importing a Roster Pattern
Once saved, you can apply a pattern to any future roster period:
- Open the Roster page and navigate to the period you want to fill.
- Click the Autofill button in the toolbar.
- Select the Import Template tab.
- Choose a roster pattern from the dropdown.
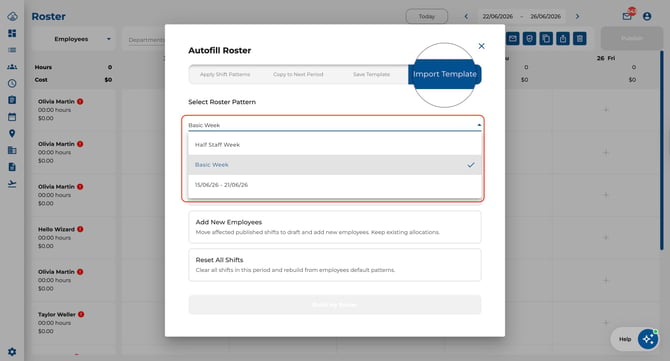
- Optionally expand Advanced Options to control how existing shifts are handled:
- Skip published shifts — keeps already-published shifts untouched.
- Add new employees — includes recently added employees.
- Reset all — clears the roster before importing.
.jpeg?width=670&height=362&name=Image%2011-06-2026%20at%2012.06%20PM%20(1).jpeg)
- Click Build My Roster.
- Confirm the action in the dialogue that appears.
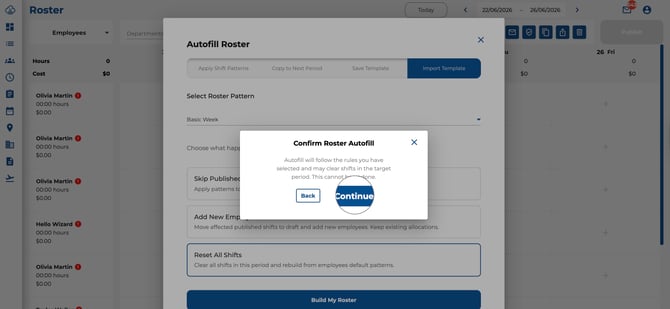
Timecloud maps the pattern onto the selected date range, creating shifts and assignments automatically.
.jpeg?width=670&height=364&name=Image%2011-06-2026%20at%2012.07%20PM%20(1).jpeg)
Archiving and Restoring Patterns
- To archive a pattern you no longer need, open it from the Shifts page and click Archive.

- To bring it back, toggle the Active switch off to view archived patterns, open the pattern, and click Restore.
Tips
- Name patterns clearly — use names like "Week A — Morning Team" or "Fortnightly Rotation" so they are easy to find later.
- Filters matter — the departments, shifts, and employees captured in the pattern determine what gets imported. If your team changes, consider updating or re-saving the pattern.
- Combine with Copy to Next Period — use roster patterns for your base schedule, then fine-tune with one-off changes each period.