
Getting Started
Navigate to Leave in the main menu. Depending on your role and permissions, you'll see one or two tabs:
- Leave — submit, view, and manage time-off requests
- Availability — mark dates or times you're available or unavailable for rostering

Leave Tab — For Employees
The Leave tab is where employees submit, track, and manage their own leave requests.
How to Submit a Leave Request
Applying for leave follows a simple step-by-step flow:
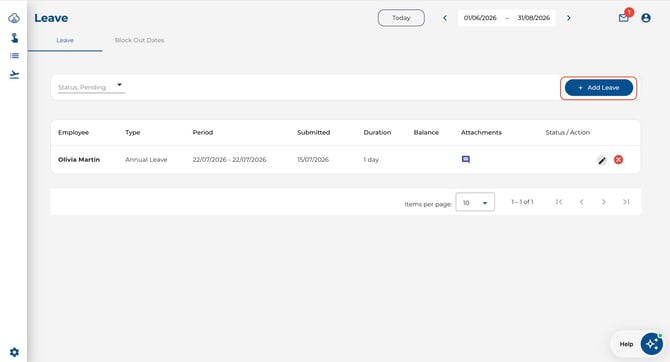
- Click + Add Leave in the top-right corner.
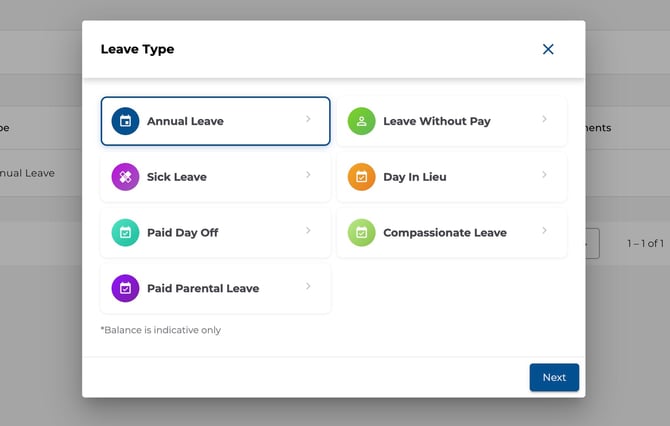
- Choose a Leave Type — browse the available leave type cards. Each card shows the leave type name and, if your company has leave balances enabled, your current balance and when it was last updated. Tap a card to select it, then click Next.
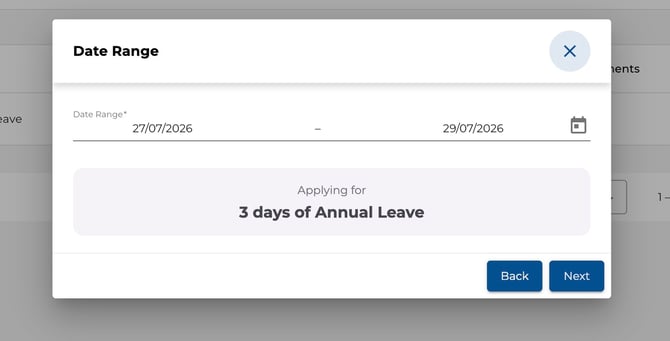
- Pick Your Dates — select your Start Date and End Date using the date picker, then click Apply. A summary card confirms what you're requesting (e.g. "3 days of Annual Leave").
- For a single-day request, you can toggle Partial Day on and enter the number of hours.
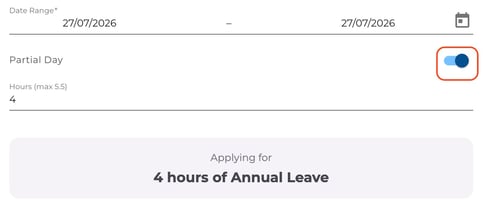
- For a single-day request, you can toggle Partial Day on and enter the number of hours.
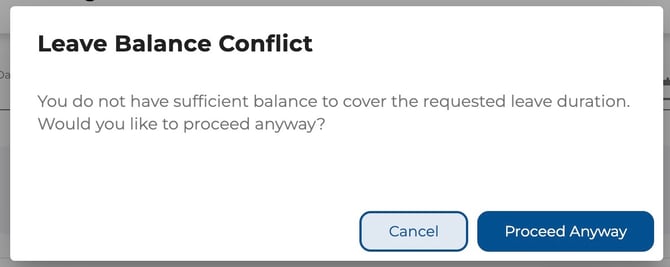
- Click Next. If your company tracks leave balances and the request would exceed your balance, you'll see a warning — you can still choose to proceed.
- Add Details — enter an optional Comment (some leave types make this mandatory). If file uploads are enabled for the leave type, click Upload File to attach a supporting document (e.g. a medical certificate).
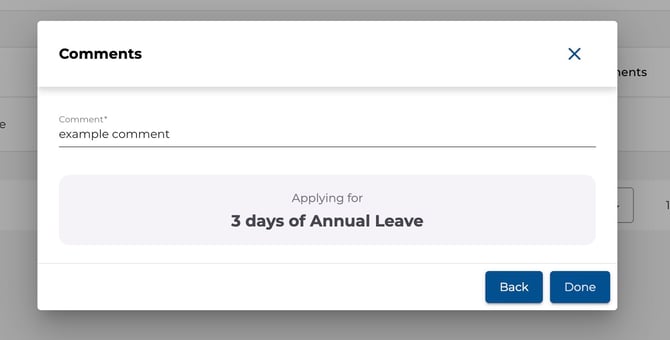
- Click Done.
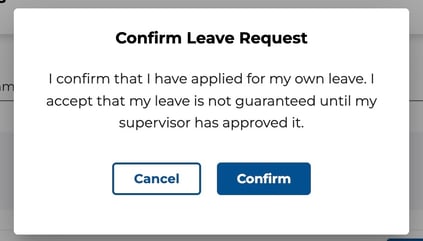
- Review the confirmation prompt and click Confirm to submit. Your request will appear as Pending until a manager acts on it.
Tip: You can navigate back through the steps at any time using the Back button. Your selections are preserved.
Understanding Request Statuses
|
Status |
What It Means |
|---|---|
|
Pending |
Your request is waiting for a manager to approve or decline it. |
|
Approved |
Your manager has approved your leave. |
|
Declined |
Your manager has declined your request. |
|
Pending Cancellation |
You've asked to cancel; awaiting manager confirmation. |
|
Cancelled |
Your request has been fully cancelled. |
How to Edit or Cancel a Request
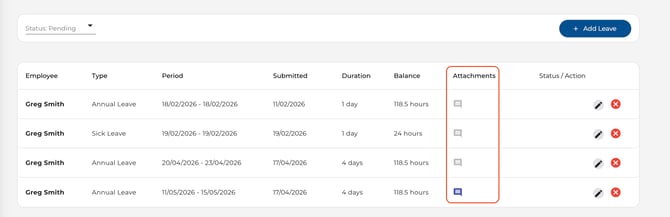
- Edit: Click the pencil icon on any Pending request to update the dates, leave type, or comment.
- Cancel: Click the cancel icon on a pending request to withdraw it. The status changes to Pending Cancellation until a manager confirms.
.jpeg?width=670&height=211&name=Image%2020-07-2026%20at%209.42%20AM%20(1).jpeg)
Viewing Leave Balances
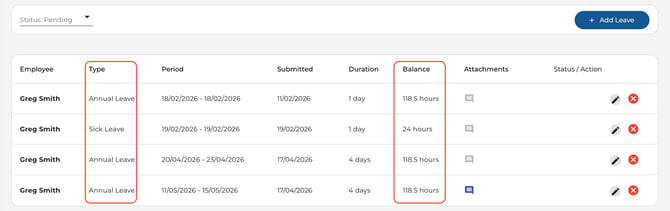
- If your company tracks leave balances, your remaining balance for each leave type appears in the Balance column.
- Balances are also shown on each leave type card when submitting a new request. The balance shown is indicative only.
- Visibility depends on your company's settings — your admin controls whether employees can see their own balances.
Comments & Attachments
- Click the comment icon on any row to open a message thread and add notes.
- Click the attachment icon (if visible) to view uploaded documents for that request.
Leave Tab — For Admins & Managers
Admins and managers see all leave requests across the company, with powerful filters and approval controls.
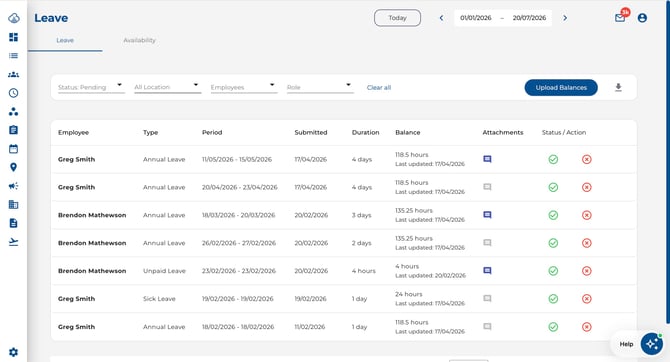
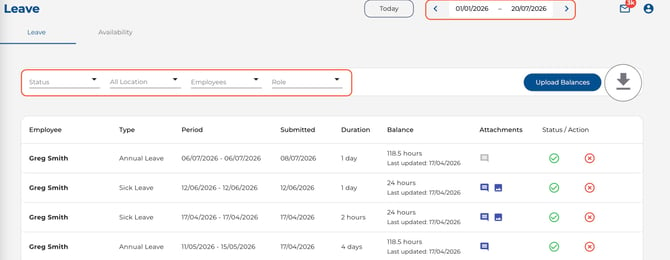
The admin view shows all leave requests with filters for Status, Department, Employee, and Role, plus approval action buttons.
Understanding the Leave Table
The leave table displays the following columns:
|
Column |
Description |
|---|---|
|
Employee |
The employee's full name. |
|
Type |
The leave type (e.g. Annual Leave, Sick Leave). |
|
Period |
The start and end date of the request (DD/MM/YYYY). |
|
Submitted |
The date the request was created. |
|
Duration |
The total leave duration (e.g. "3 days" or "4 hours"). |
|
Balance |
The employee's remaining balance for that leave type (if balances are enabled). |
|
Status / Action |
For pending requests: approve or decline buttons. For processed requests: the status chip, who actioned it, and the date — with a reset option. |
How to Filter Requests
Use the filter bar at the top to narrow the list:
- Status — filter by Pending, Approved, Declined, or Cancelled (defaults to Pending).
- Department — select one or more departments to view.
- Employees — search and select specific employees.
- Role — filter by company role (if roles are enabled).
- Click Clear all to reset all active filters.
.jpeg?width=644&height=354&name=Image%2020-07-2026%20at%209.44%20AM%20(1).jpeg)
How to Approve, Decline, or Reset a Request
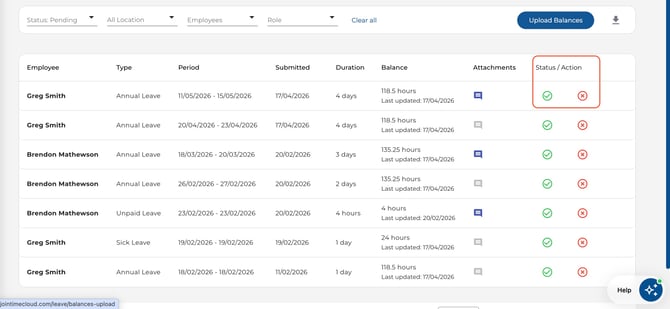
The Status / Action column adapts based on the request's current state:
- Pending requests show two action buttons:
- Approve (green tick icon) — approves the leave. If the employee's balance would go negative, you'll see a warning — you can still choose to approve.
- Decline (red cross icon) — declines the request.
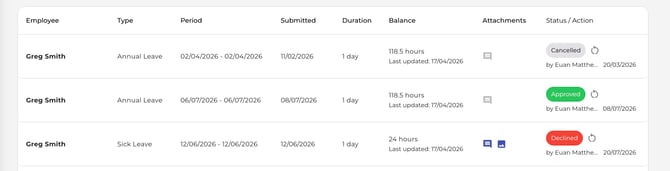
- Processed requests (Approved, Declined, or Cancelled) show:
- A status chip (e.g. Approved, Rejected, Cancelled)
- The name of the person who actioned it and the date
- A Reset button to return the request to Pending so it can be re-actioned
How to Download the Leave Report
You can export a CSV report of leave applications directly from the Leave page:
- Apply any filters you need (status, department, employees, role, date range).
- Click the download icon in the toolbar (next to the balance buttons).
- A CSV file will download containing all leave applications matching your current filters.
The report includes: Employee No, First Name, Last Name, Type, Start Date, End Date, Submission Date, Duration, Balance, Comment, File (whether an attachment exists), Status, Approved Date, and Approved By.
How to Update Leave Balances
- From a payroll integration: Click Update Balances (sync icon) in the toolbar to refresh balances from your connected payroll provider.

- From a CSV file: Click Upload Balances to open the bulk upload wizard:
- Step 1 — File Upload: Drag and drop or select your CSV/spreadsheet file. A template is available for download.
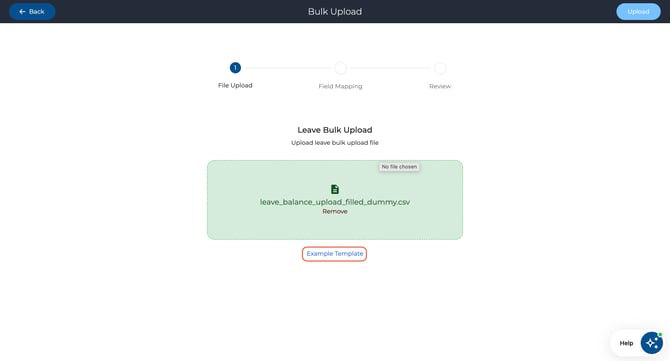
- Step 2 — Field Mapping: Map your file columns to the correct fields (Employee Payroll Code, Leave Type, Balance, Units).
.jpeg?width=670&height=232&name=Image%2020-07-2026%20at%209.57%20AM%20(1).jpeg)
- Step 3 — Review: Confirm changes. The summary shows how many rows were updated, skipped, or had errors.
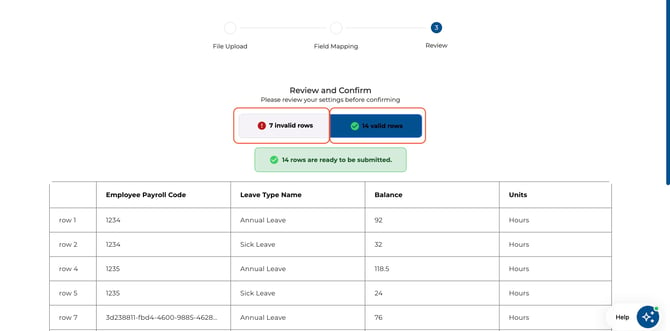
- Step 1 — File Upload: Drag and drop or select your CSV/spreadsheet file. A template is available for download.
Adjusting the Date Range
- The Leave page defaults to showing requests from last month through to the end of next month.
- Use the date filter in the navigation bar to adjust the window and view older or future requests.
.jpeg?width=670&height=123&name=Image%2020-07-2026%20at%209.58%20AM%20(1).jpeg)
Availability Tab — For Employees
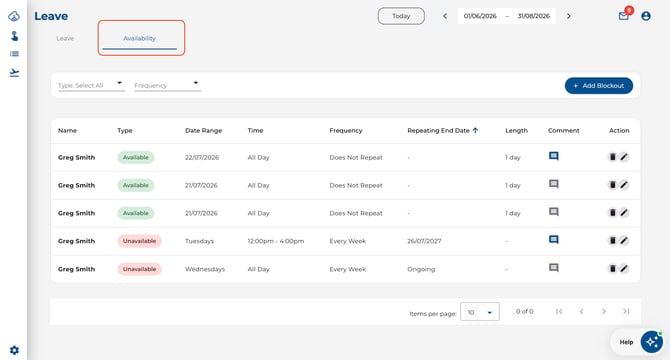
The Availability tab displays your availability and blockout rules, with options to add, edit, or delete entries.
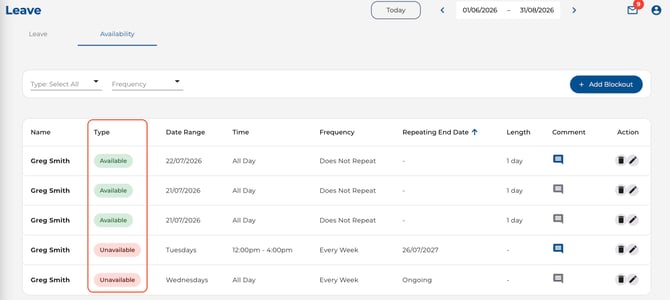
Each entry has a Type:
- Available — marks dates or times when you are available for rostering. Shown with a green badge.
- Unavailable — marks dates or times when you are not available (a traditional blockout). Shown with a red badge.
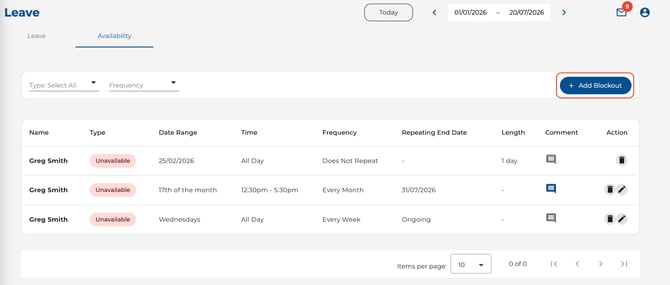
How to Add an Availability or Blockout Entry
- Click + Add Blockout in the top-right corner.
- A dialogue appears asking you to select Blockout Type. Choose Available or Unavailable.
.jpeg?width=670&height=227&name=Image%2020-07-2026%20at%2010.22%20AM%20(1).jpeg)
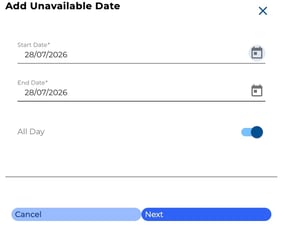
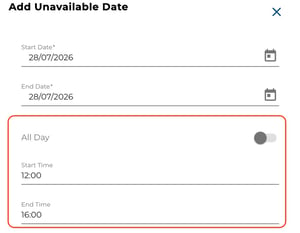
- Set the Start Date and End Date.
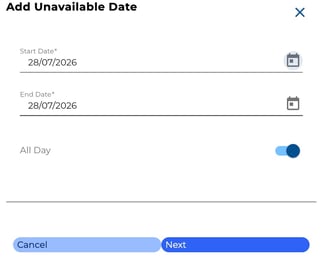
- Choose whether it's All Day, or enter a specific Start Time and End Time.
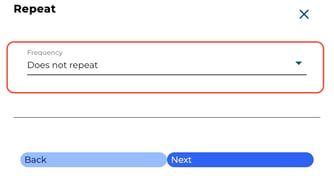
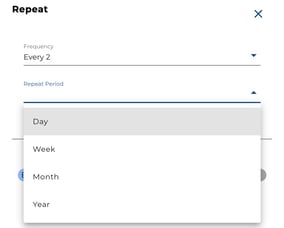
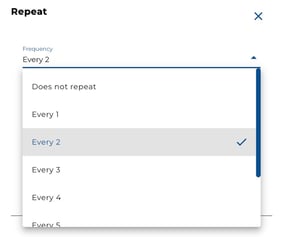
- Optionally set a Repeat pattern — Daily, Weekly, Monthly, or Yearly.
- Choose Ongoing to repeat indefinitely, or set a Repeat Until date.
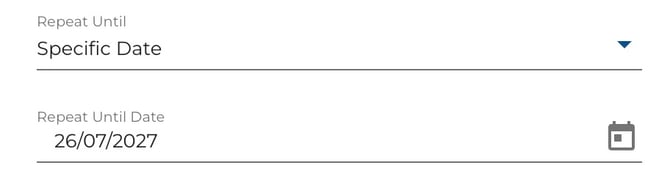
- Choose Ongoing to repeat indefinitely, or set a Repeat Until date.
- Add an optional Comment (up to 140 characters) to explain the reason.
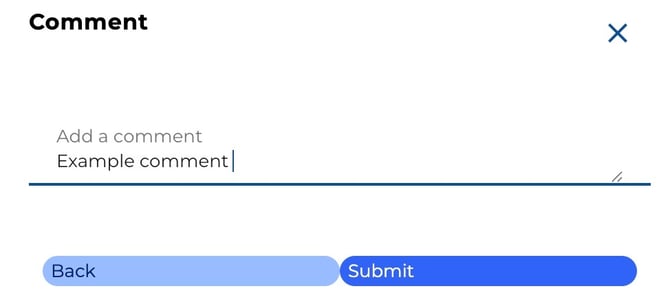
- Click Submit.
When you submit, update, or delete an entry, your managers receive an email notification (if your company has Block Out / Availability Emails enabled in Settings → Notifications). This keeps your team informed of changes without requiring manual follow-up.
How to Edit or Delete an Entry
- Edit: Click the pencil icon on any entry that hasn't expired to update its details.
- Delete: Click the trash icon and confirm to remove the entry entirely. The confirmation message adjusts based on the type — e.g. "Delete Availability Rule" or "Delete Blockout Rule".
.jpeg?width=670&height=238&name=Image%2020-07-2026%20at%2010.28%20AM%20(1).jpeg)
Availability Tab — For Admins & Managers
Admins can view all availability and blockout rules across the company but do not create or edit entries on behalf of employees — each employee manages their own.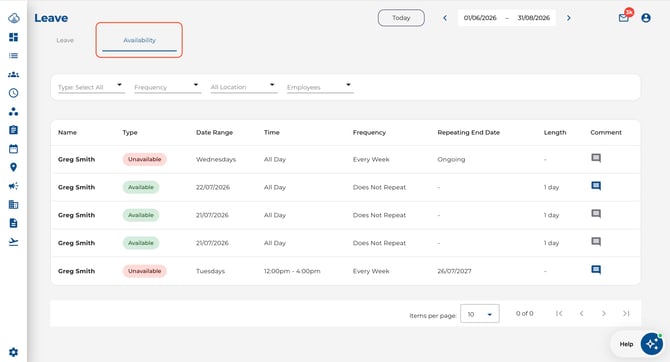
Manager Notifications
When Block Out / Availability Emails is enabled in Settings → Notifications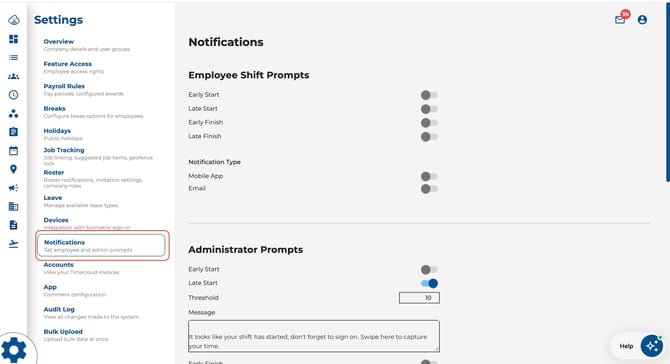
Managers and admins receive an email whenever an employee submits, updates, or deletes an availability or blockout entry. The email includes the date range, times, recurrence details, and any comment the employee added. Notifications respect direct reporting lines — managers only receive alerts for employees who report to them.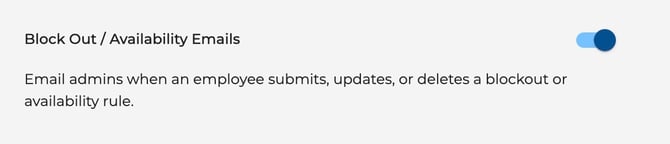
Individual managers can opt out of these emails from their employee profile (Operations → Reports → Block Out / Availability Emails toggle).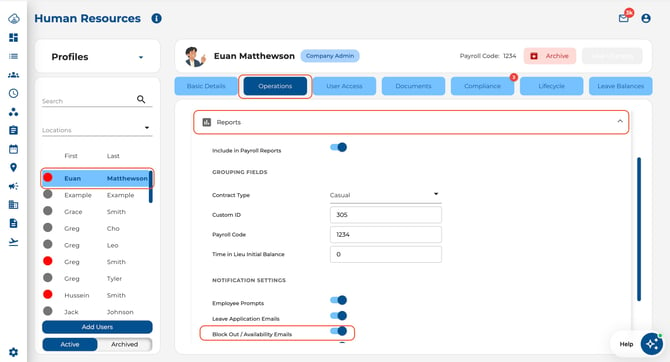
Understanding the Table
The table shows the following for each rule:
- Name — the employee who created it.
- Type — an Available (green) or Unavailable (red) badge.
- Date Range — the start and end dates of the rule.
- Frequency — whether the rule repeats and on what schedule.
.jpeg?width=670&height=201&name=Image%2020-07-2026%20at%2010.42%20AM%20(1).jpeg)
How to Filter Rules
- Type — filter by Available, Unavailable, or view all types at once.
- Frequency — filter by Does Not Repeat, Daily, Weekly, Monthly, or Yearly.
- Department — narrow results to specific departments.
- Employee — search for a specific team member.
- Click Clear all to reset filters.
.jpeg?width=670&height=253&name=Image%2020-07-2026%20at%2010.42%20AM%20(2).jpeg)
Availability Conflicts on the Roster
When scheduling on the Roster, only Unavailable entries cause conflict warnings. If you try to assign a shift to an employee with an active Unavailable rule during that time, a conflict warning appears. You can choose to Proceed Anyway or cancel the assignment. Available entries do not block scheduling — they indicate the employee's preferred working windows.
Leave Settings (Admin Only)
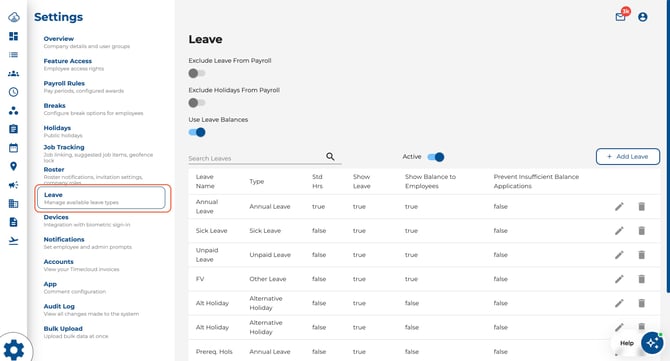
The Leave Settings page lets admins configure leave types, toggle balance tracking, and connect payroll providers.
Key Settings
|
Setting |
What It Does |
|---|---|
|
Include Job Tracking in Payroll Export |
Includes job tracking data when exporting leave to payroll (only visible for certain payroll systems). |
|
Exclude Leave From Payroll |
Prevents leave entries from appearing in payroll exports. |
|
Exclude Holidays From Payroll |
Prevents public holidays from appearing in payroll exports. |
|
Use Leave Balances |
Enables leave balance tracking. When on, balances appear in the Leave tab and on employee profiles. |
How to Create or Edit Leave Types
- In the Leave table on the settings page, click + Add.
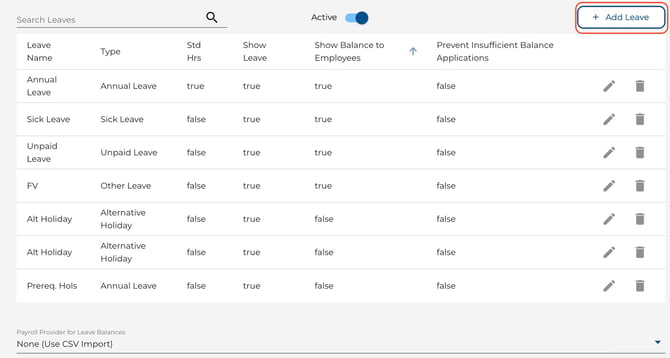
- Enter a Leave Name (e.g. "Annual Leave", "Sick Leave").
- Set the Payroll Code for integration with your payroll system.
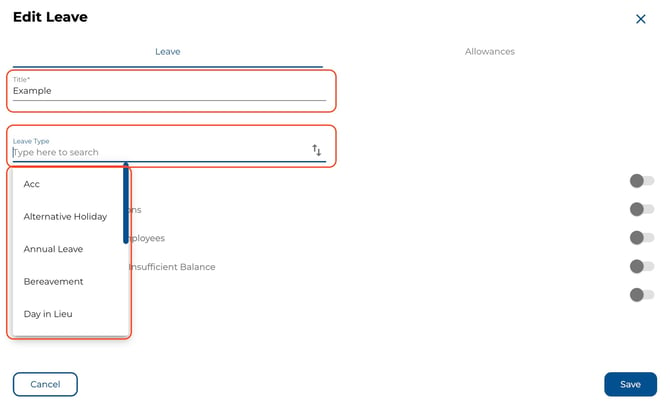
- Configure optional settings:
- Show Leave — makes this type visible to employees on the Leave page.
- Show Balance to Employees — lets employees see their remaining balance for this type.
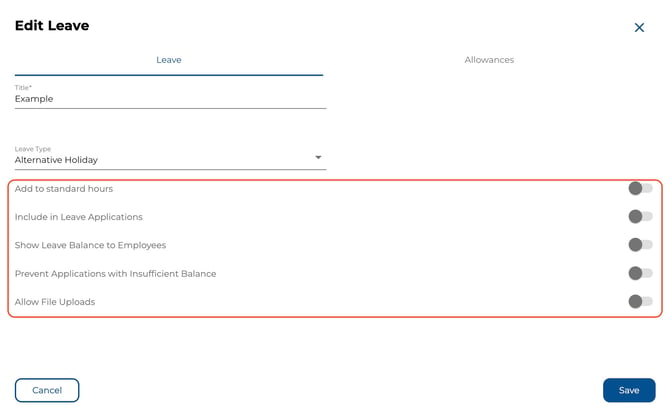
- Allow File Upload — lets employees attach files (e.g. medical certificates) when requesting this leave type.
-
- Require File Upload — makes the attachment mandatory.
.jpeg?width=670&height=365&name=Image%2020-07-2026%20at%2010.48%20AM%20(1).jpeg)
- Require Comment — makes the comment field mandatory.
- Minimum Notice (Days) — sets a minimum number of days' notice for requests of this type.
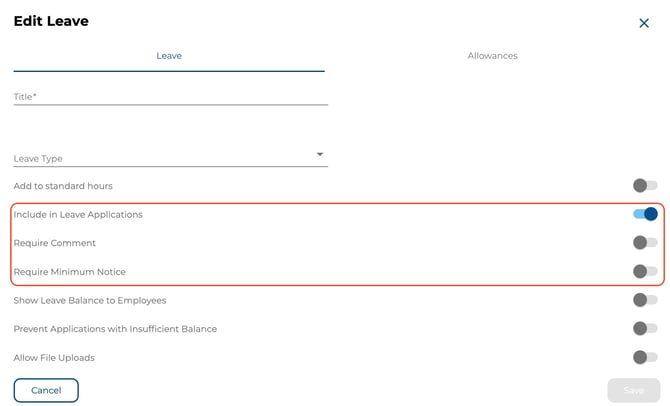
- Require File Upload — makes the attachment mandatory.
- Click Save.
How to Connect a Payroll Provider for Balances
- Scroll to Payroll Provider for Leave Balances.
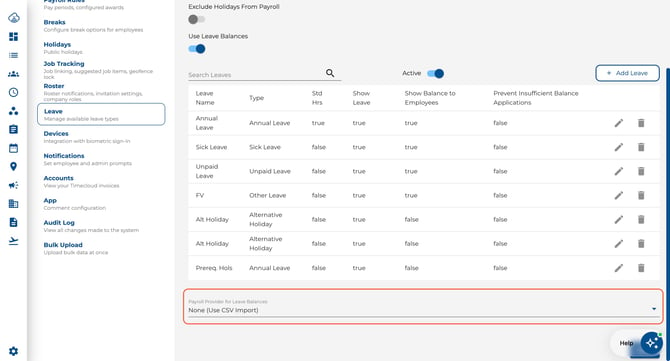
- Select your payroll provider from the dropdown, or choose None (Use CSV Import) for manual uploads.
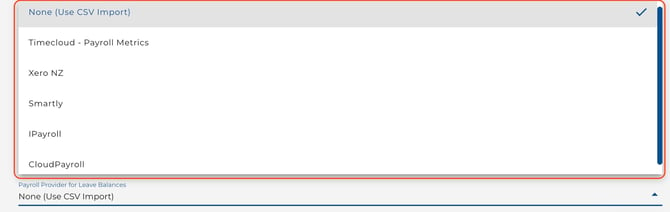
- Click Save.
.jpeg?width=670&height=401&name=Image%2020-07-2026%20at%2010.52%20AM%20(1).jpeg)
Tips & Best Practices
- Step-by-step flow: The leave application wizard guides you through choosing a type, picking dates, and adding details — use the Back button to review earlier steps.
- Balance shown on cards: When leave balances are enabled, each leave type card shows your current balance — this is indicative only.
- Date range matters: The Leave page loads a default window. Adjust the date filter at the top if you can't find a specific request.
- Leave types are configurable: Leave types, balance rules, attachment requirements, and minimum notice periods are all managed in Settings → Leave by your admin.
- Public holidays are separate: They're managed in Settings → Holidays and don't appear on the Leave page.
- Available vs. Unavailable: Use Available to tell your manager when you can work, and Unavailable to block out times you can't. Only Unavailable entries trigger roster conflict warnings.
- Type filter saves time: Use the Type filter to quickly see only availability windows or only blockouts. Your filter choice is remembered between visits.
- Manager notifications: When Block Out / Availability Emails is enabled, managers are automatically emailed whenever you submit, update, or delete an availability or blockout entry — no need to notify them manually.
- Check balances before approving: When leave balances are enabled, Timecloud will warn you if an approval would push an employee's balance into negative.
- Export with filters: The download button respects your active filters — set the date range, status, and department before exporting to get exactly the data you need.
- Review details at a glance: Processed requests show who actioned them and when, so you can quickly audit approval history without opening individual records.