1. Select iPayroll in Payroll System settings
- Select the iPayroll payroll system from Settings > Payroll

2. Navigate to the payroll page
Navigate to the Payroll page, using the ‘Payroll’ icon in the left-hand nav bar.
- Clicking on this page will either take you to a ‘connect to payroll’ page, if you haven’t already connected to your payroll system, or straight to the ‘Pay Rates’ page, if you have already successfully connected to your payroll system.

3. Login to Payroll
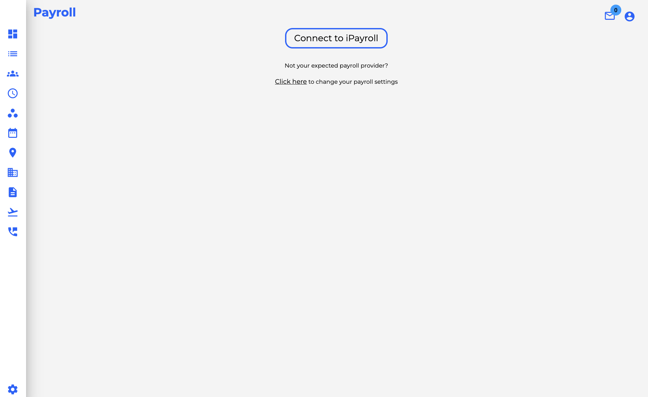
- If the company has not already connected to their Payroll Provider, they will be shown the above screen.
-
The ‘click here’ link takes the user to the ‘Settings > Payroll’ page, displayed above.
- When the user clicks on the ‘Connect to ….’ button, they will be redirected to their payroll provider to login.


- If the user is already logged into their Payroll Provider, they may not need to re-login. This could mean that the page redirects several times, or sits on a loading wheel.
- The automated redirection process (After successful login) should not take more than 10 seconds.
- After successful login and authorisation, the user will be redirected back to Timecloud, and the Pay Rates page.
- Payroll Pay Rates need to be bound to Timecloud Pay Rates, for timesheet publish.
- The first time anyone from a company loads this page, all Pay Rates will need to be manually assigned. After they have been assigned for the first time, the system will remember the relationship, and use it for future payroll exports.
- Select a Payroll Pay Rate for each Timecloud Pay Rate, using the selection list in the ‘action’ column.
- The
 icon indicates that the relationship has been successfully saved (or recalled, in subsequent pay runs)
 - The
 icon indicates that attention is required, as there is not a relationship set.

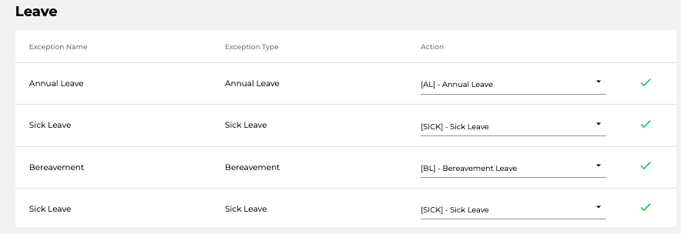
- If the payroll system supports leave in the Timesheet publish, Payroll Leave Elements need to be bound to Timecloud Exceptions, for timesheet publish
- The first time anyone from a company loads this page, all Pay Rates will need to be manually assigned. After they have been assigned for the first time, the system will remember the relationship, and use it for future payroll exports.

-
Select a Payroll Leave Element for each Timecloud Exception, using the selection list in the ‘action’ column.
-
The
 icon indicates that the relationship has been successfully saved (or recalled, in subsequent pay runs)
 -
The
 icon indicates that attention is required, as there is not a relationship set.
 -
If an Timecloud Exception is not bound to a Payroll Leave Element, the exception will be skipped during Timesheet generation and publish
7.Employees
-
Payroll Employees need to be bound to Timecloud employees, for timesheet publish.
-
The first time anyone from the company loads this page, desired employee relationships will need to be checked.
-
The system will automatically try and link employees, using different keys per payroll system. Employees can also be manually linked from this page, and automatically generated relationships can be overridden.

NOTE : If the system does not have a payroll relationship for an employee, the employee will be skipped for Timesheet publish.
- The system will remember existing relationships, meaning that after first time setup, payroll admins should only need to update changed employees.
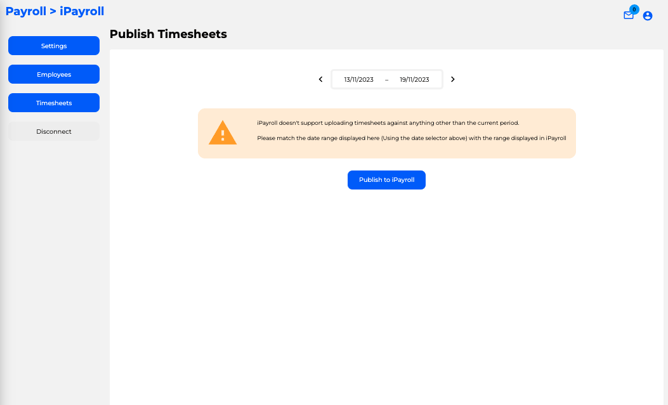
- Once Pay Rate and Employee relationships have been setup, timesheets can be published to the Payroll System.
- Use the date range picker at the top of the page to select the same period as the pay period in the payroll system (If the companies Pay Period, Weekday Start, and other Pay Period settings have been configured correctly, this range should be automatically correct)

